|
Making a video or audio file smaller
You can use Multimedia Xpert's Conversion tab also to make a video or audio smaller. But just running a compression program over the file won't work in most cases because a multimedia file is by its architecture already a compressed format. And the compression was even especially designed for multimedia data, other than the algorithms of a compression program. If you try to compress it by a compression program it will stay about the same size or can even get bigger. The only chance you have is to reduce the quality or content of the file. You have these options:
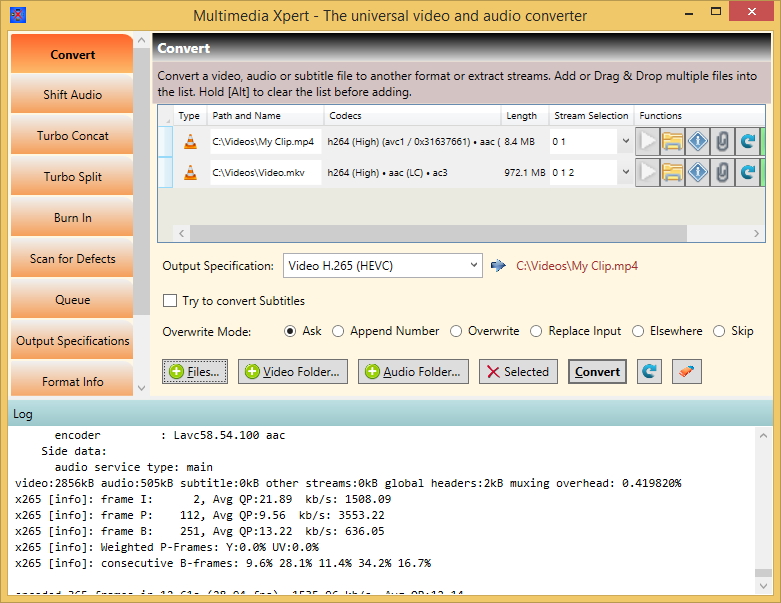
- Removing unused streams: Switch to the Convert tab and drop resp. select your media file. In the column 'Stream Selection' you can now see the video and audio streams inside. Audio streams in a video file usually have the three letter language ISO code directly after the stream number, eg. "#1: (eng),.....". In this case stream number 1 would be in english language. "(und)" stands for "undefined" and can be anything. You can also press
 to see more info. Choose all those streams you can do without, for example those in foreign languages, and untick their checkboxes. Sometimes a video also contains the same content encoded in another format. You can also remove one of them. To remove streams without doing a slow conversion see here. to see more info. Choose all those streams you can do without, for example those in foreign languages, and untick their checkboxes. Sometimes a video also contains the same content encoded in another format. You can also remove one of them. To remove streams without doing a slow conversion see here.

- You can choose another output format which compresses better by selecting another 'Output Specification'. For example if your video is an MP4 video you could choose to convert it to H.265 (=HEVC) to get a 20 % smaller file. But be warned that this format is not as widely supported as H.264. Older hardware uses chips that can process H.264 but not H.265 and in Windows 10 the user has to add a codec manually to make H.265 playable (or s/he installs a player like VLC). If your file is an audio file like wav you could select “Audio MP3" which compresses much better and has also a better compatibility.
- Trimming the media: If you can do without a part at the start or end, switch to the Output Specification tab and enter the corresponding time indices into the fields called 'Extract Range'. Read more about that here.
- Reducing the quality: You can lower the amount of data in the media file considerably if you dial down either 'Bitrate', 'Quality', 'Frame Rate', 'Height'/'Width' or 'Pixel Format' in the Output Specification. In this case the video will have to be converted, which means, the fields 'Video Codec' and 'Audio Codec' must be filled. But be warned that only 'Video Bitrate' and 'Audio Bitrate' are the ones that don't reduce the compatibility with the players that will later play the video. A lower 'Bitrate' can be handled by (maybe?) all players while lower frame rates, smaller image size and especially different 'Pixel Formats' can lead to not being able to be played. For 'Pixel Format' a format with 8 bits is the standard. If you have an MPEG video with 10 or even 12 bits pixel depth (like for example Amazon Video) you can dial down to 8 bits by selecting the pixel format "yuv420p". How to convert between color depths is described here.
As a summary: The smaller any of the above values are the smaller your media file will get.
Tip: For testing the quality of the output just convert about 20 seconds by entering "20" into the right box of the 'Extract Range' in the Output Specification.
|


